Video Game Design II: DEPLOYING LIBGDX ON IOS
In this second entry I am going to review all the neccesary steps to build the default LibGDX base project. The example will be running on two different platforms: Desktop (which is pretty much straightforward if you follow the wiki and iOS. Testing our project in our Apple phone devices… well, it can be a bit tricky, it is not hard, but you have to scrupulously follow some steps.
If you want to try the same project on Android devices there is enough documentation in the LibGDX wiki.
It is true that this entry breaks a little bit the flow on the video games developing series, but this is so important that I think is well worth leaving everything written down before moving on.
Prerequisites:
-
IDE → IntelliJ IDEA
-
Hardware I am using → Macbook Pro retina mid 2014 and iPhone 5c.
-
Apple Developer Account (free version) → In order to sign the app being created we need an Apple Developer Account. This account is free and will allow us to sign apps to be used in our devices, although we obviously can’t publish them in the App Store. If we also want do so, we mush adhere to the Apple Developer Program, which costs 100€ per year.
Step 1: Download LibGDX framework and create a new project.
Go to the LibGDX download page and run the jar. We fill up the available options as follows:
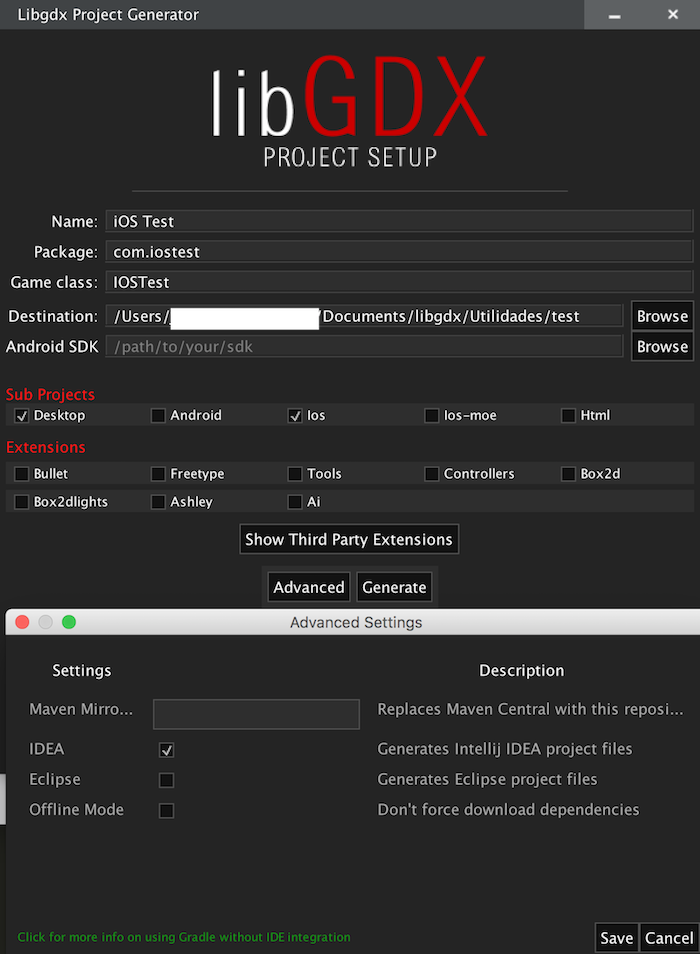
As you can see we are only generating Desktop and iOS projects.
BEWARE: Before finishing, go to “Advanced” and tick “IDEA” as we are going to use this IDE.
It is absolutely critical to pay attention at the “Package name” written because it will be decisive to run the app on iOS.
Step 2: Open the created project and run it in Desktop.
We open IntelliJ IDEA → Open→ Move to the path we created the base project and then select the *.ipr file.
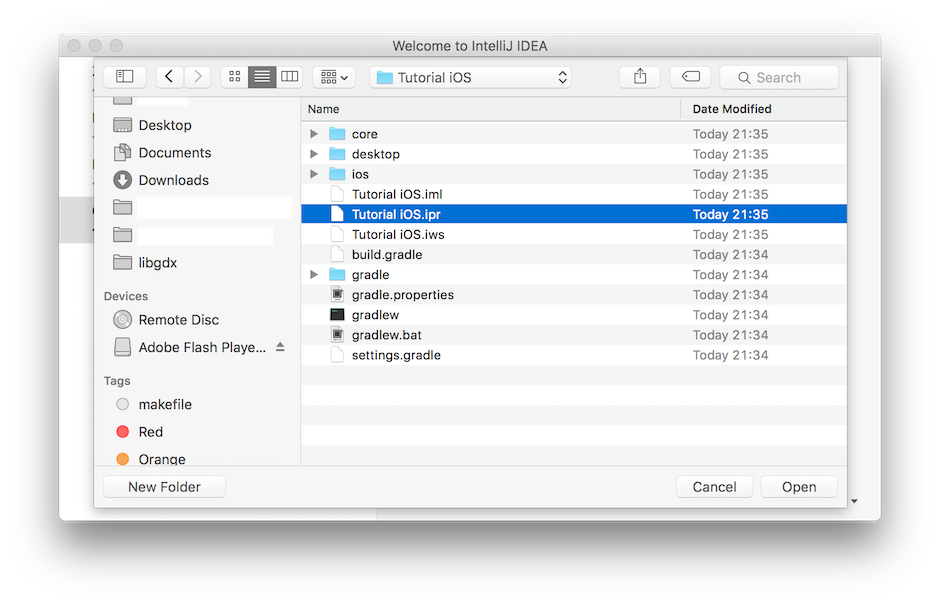
Click on “Import Gradle” and we select all the possible options.
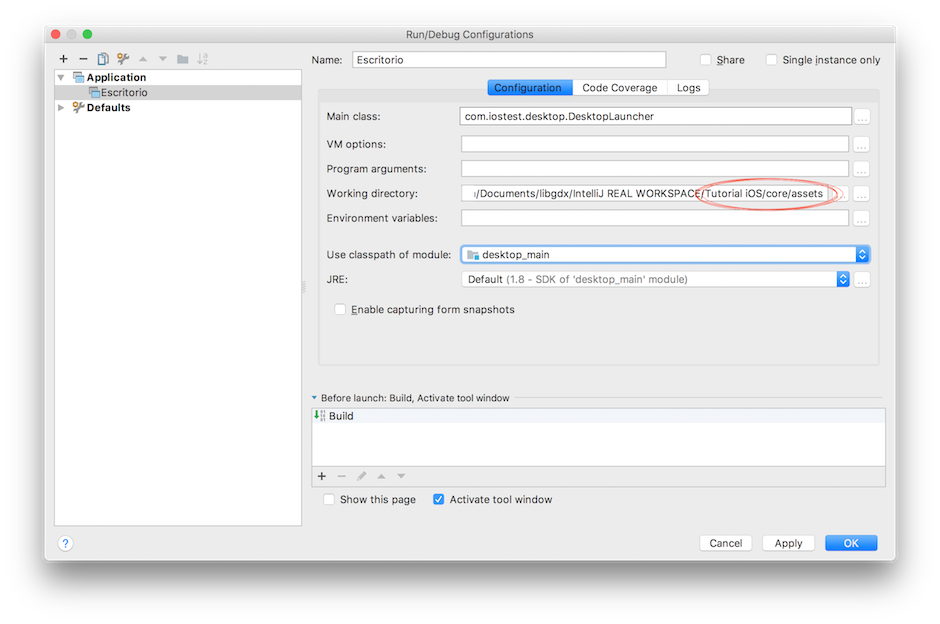
To run the Desktop project we have to create a “Run configuration”. We go to menu Run → Edit Configurations and the click to the “+” symbol to add an application. We have to fill everything like in the following picture: be careful with the working directory!
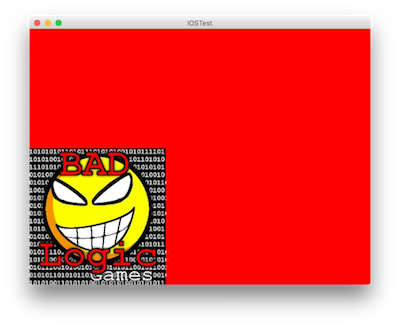
To run the demo now, simply click on the “Play” button or push ctrl-r and voalá:
Step 3: Let’s run the demo on iOS!
First things first, let’s download the 2.3.0 MoviDevelop Plugin for IDEA (the former RoboVM). You can find it in the official Movidevelop Web. To install the plugin follow the steps written there:
- Install Xcode on Mac OS X, open it once and agree to the license
- Download the RoboVM IntelliJ IDEA plugin Jar
- Open IntelliJ IDEA/Android Studio, go to Preferences -> Plugins
- Click Install plugin from disk…
- Select the Jar you downloaded and re-start IntelliJ IDEA/Android Studio
Now we create a XCode project with the exactly same package we used for our project. This is the only way we can sign our app:
- Open XCode.
- New XCode Project →Single View Application …
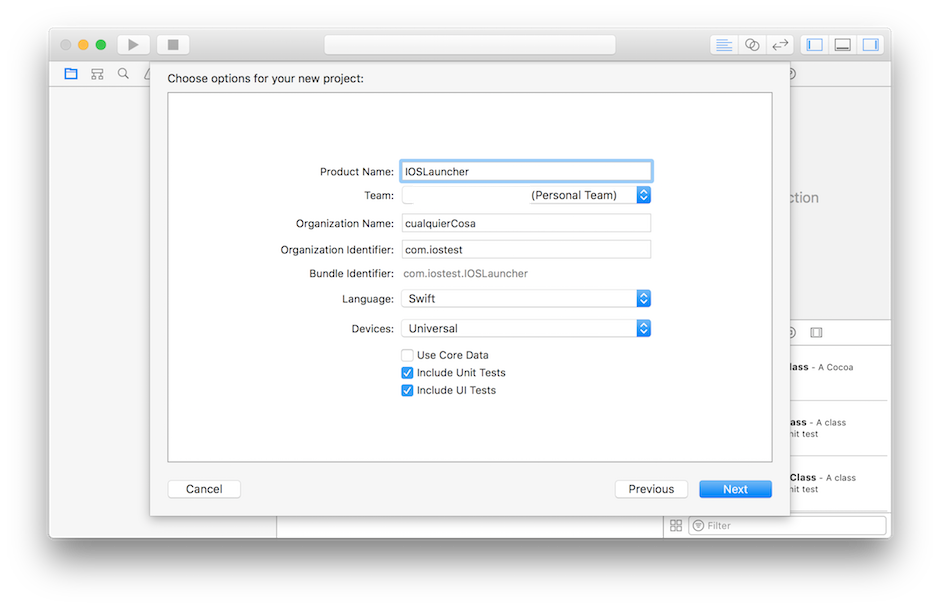
CAUTION –> The “Organization identifier” value has to be the same that “Package” we used in LibGDX. CAUTION –> The product name has to be: IOSLauncher.
We finish the creation; it doesn’t matter where we store the project. And then we change the Identity again to match out LibGDX Package:

CAUTION –> Xcode should automatically sign this app. Take into account that with the base developer account you can only sign 10 apps each 7 days (yes, thanks Apple).
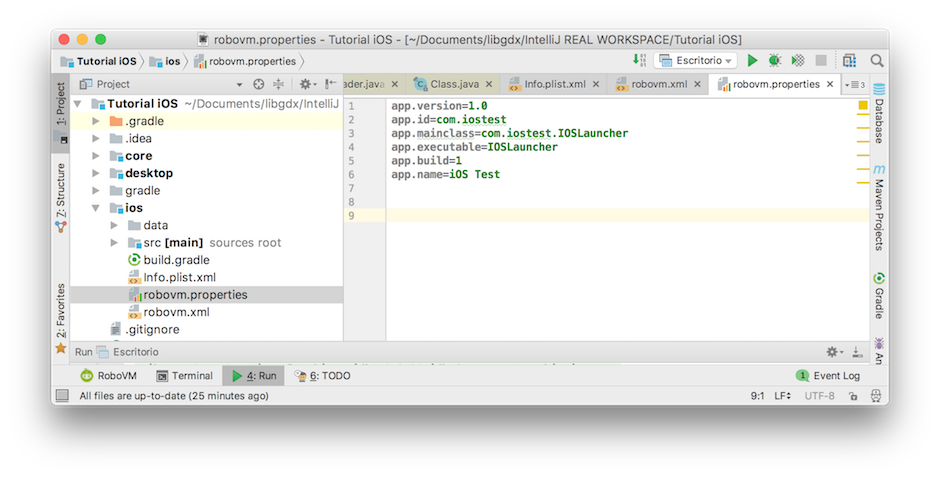
To be really sure everything is as expected I will show you my robovm.properties file which is located inside the “ios” project:
Finally we create a new “Run configuration”, but this time we select a RovoVM iOS configuration:
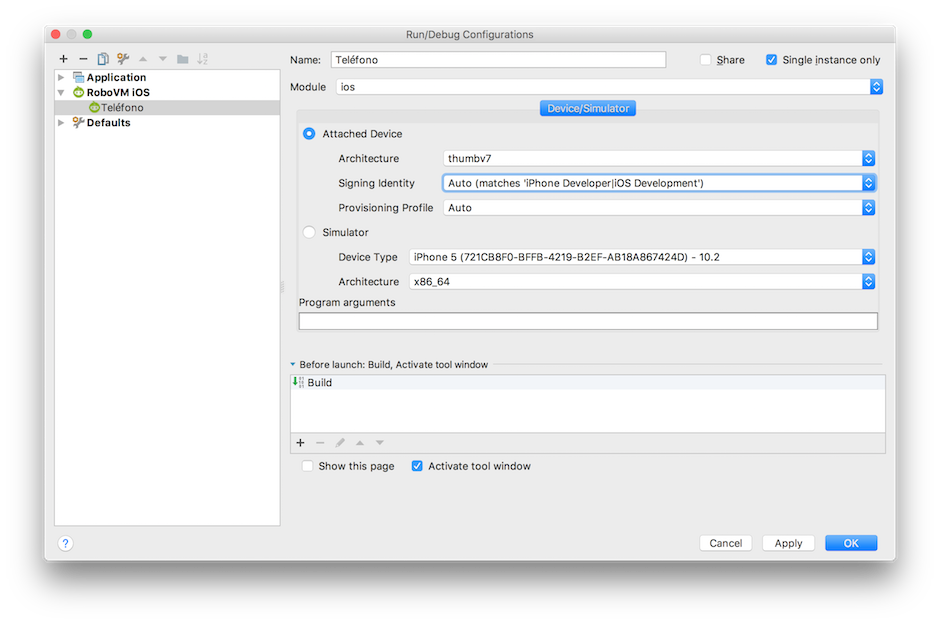
And now when we click “Run” or “Ctrl-R” the Base project will be install in our device as a regular App. Lastly you have to accept your developer sign in your device in order to run the code.
To sum up
Creating a base project and make it run natively on iOS isn’t particularly difficult but we have to be careful. There aren’t many updated tutorials in this particular topic in the libGDX wiki or community, hence this entry.
Please post here if you need help. Don’t forget to follow me on twitter for more entries like this → @Musicaligera_